Welcome to Houston
This manual will guide you through the Houston software application for configuring your Ex Machina loudspeakers.
Houston runs entirely in your web browser, there's nothing to install. You'll reach it either through a per-speaker or per EXCore address, e.g exmachina-terra-a-0001.local, exmachina-core-a-s-0001.local or through the Speaker Directory at exmachina.local, which lists every speaker on your network. The section below covers getting connected the first time.
Getting Connected for the First Time
Before using Houston, your speakers need to join your WiFi network, a one-time setup separate from Houston's configuration screens. Full step-by-step instructions with photos are at exmachinasound.com/launchpad. Once connected, your speakers will remember the network and appear in Houston's Speaker Directory at exmachina.local.
The Configuration Screen
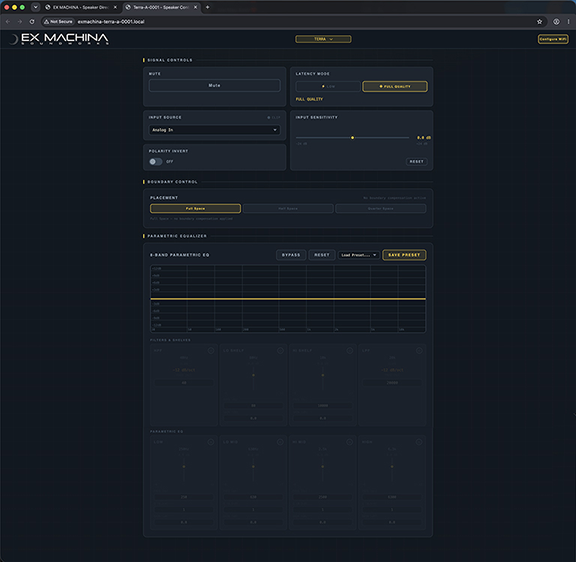
Pictured here (Terra main configuration page) 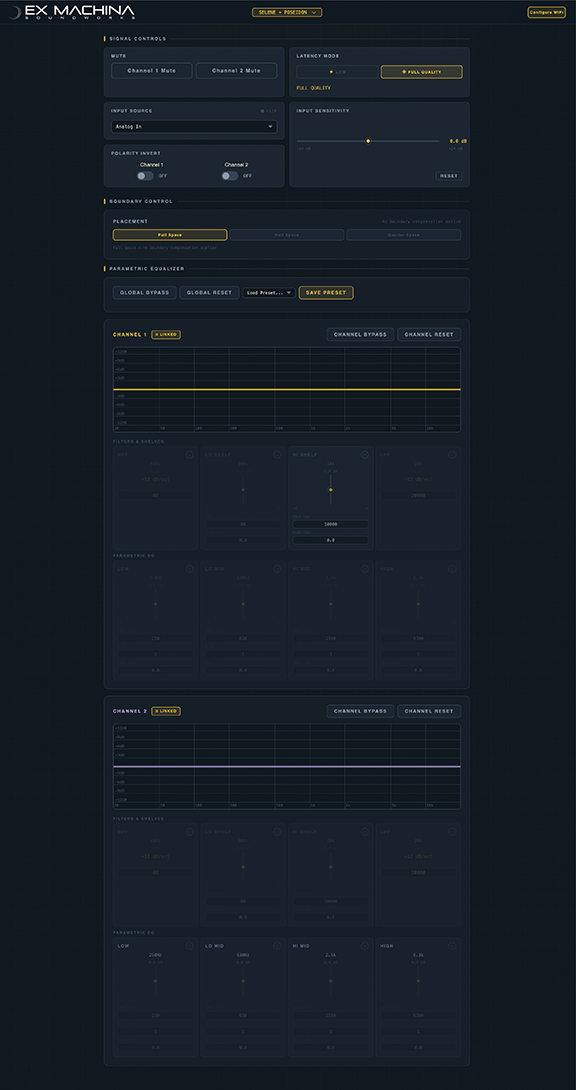
Pictured here (EXCore main configuration page)
Speaker Type Selection
A dropdown menu at the top of the configuration screen sets which system you're controlling: Terra, Terra + Gravity, Selene, or Selene + Poseidon. Houston adjusts the available controls below based on this selection, for example, Gravity-specific controls only appear once Terra + Gravity is selected.

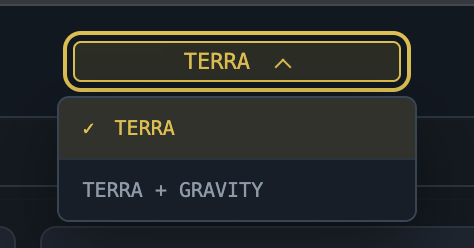
For EXCore the drop down will display the two different speaker selection modes for Selene or Selene+Poseidon. 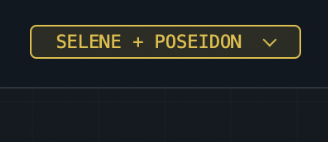
Signal Controls
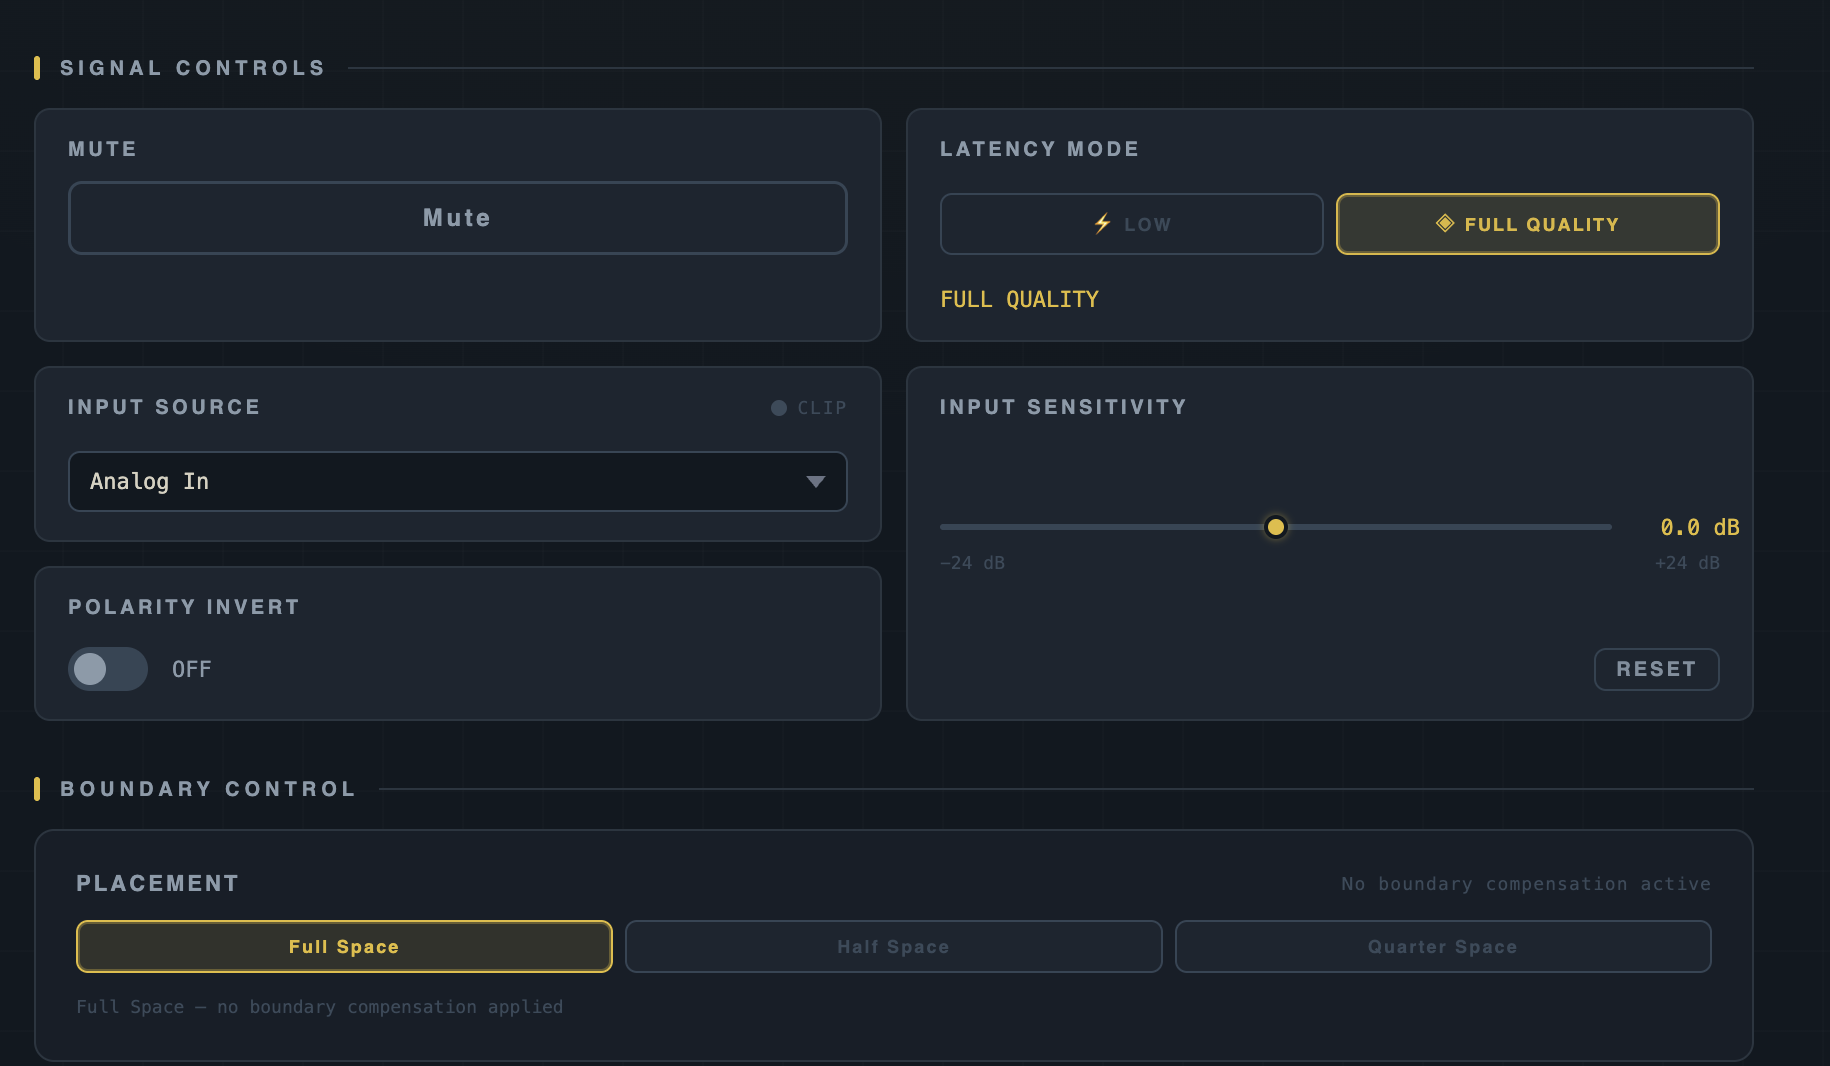
Pictured here (Terra Signal Control) 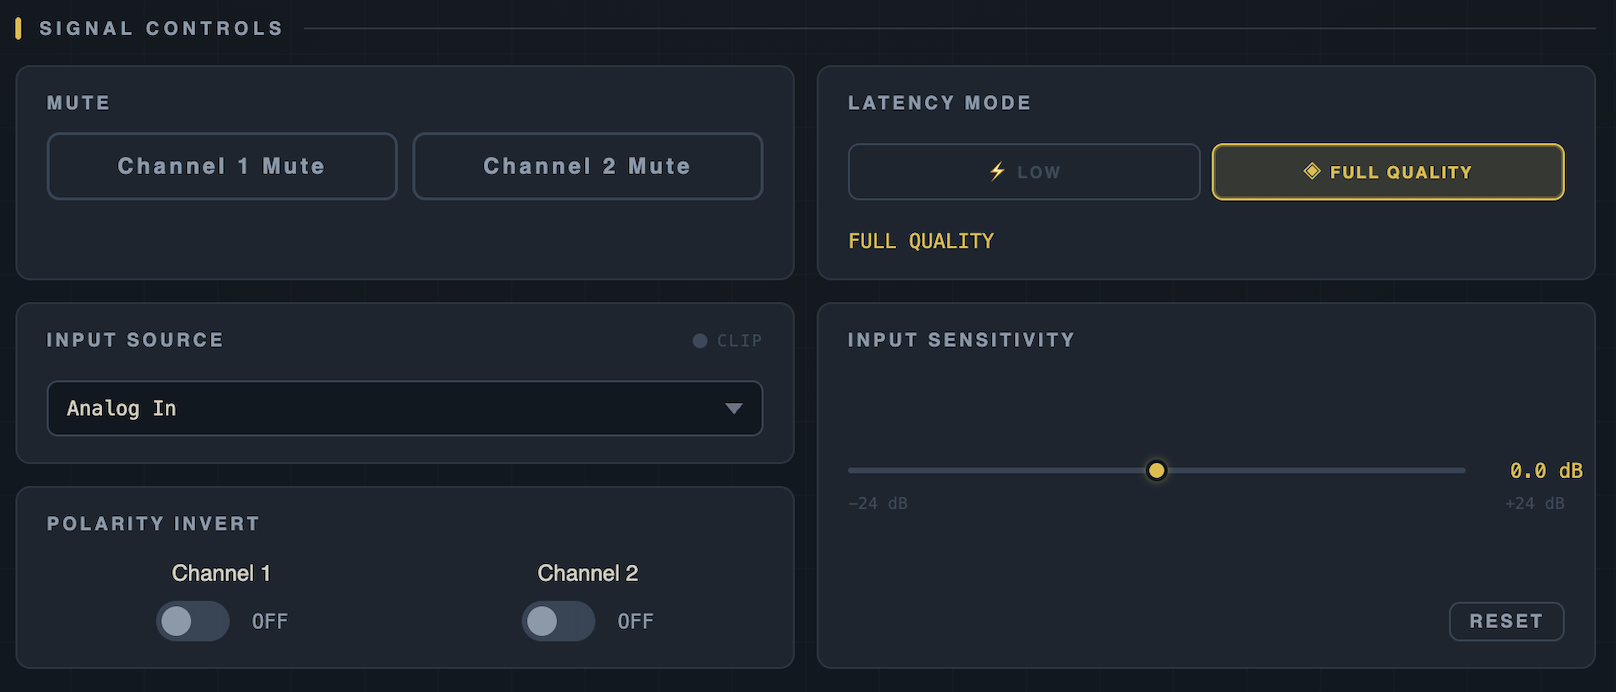
Pictured here (EXCore Signal Control)
Mute
Mutes the input channel. On Selene and Selene + Poseidon, each input channel (Channel 1 and Channel 2) has its own independent mute.
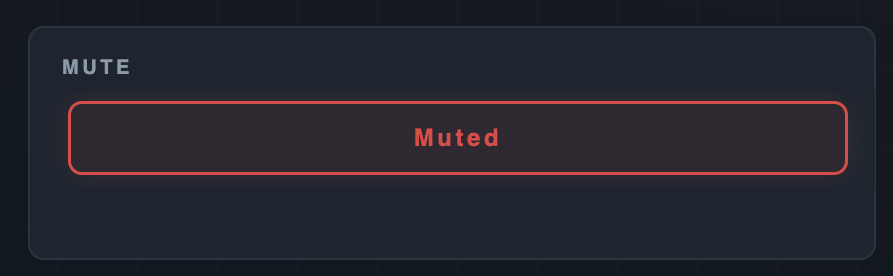
Pictured here (Terra Mute Control) 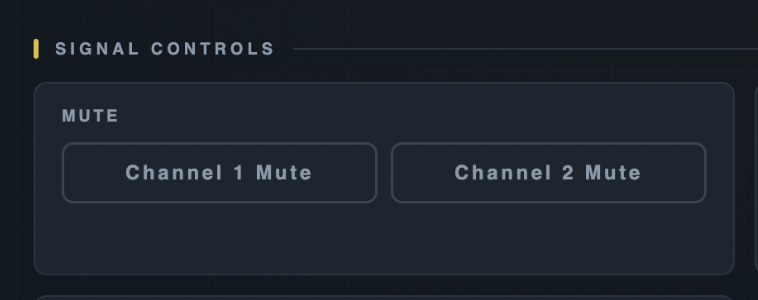
Pictured here (EXCore Mute Control)
Latency Mode
Houston offers two processing modes:
- Full Quality Mode — complete phase and magnitude calibration, introducing approximately 46ms of latency.
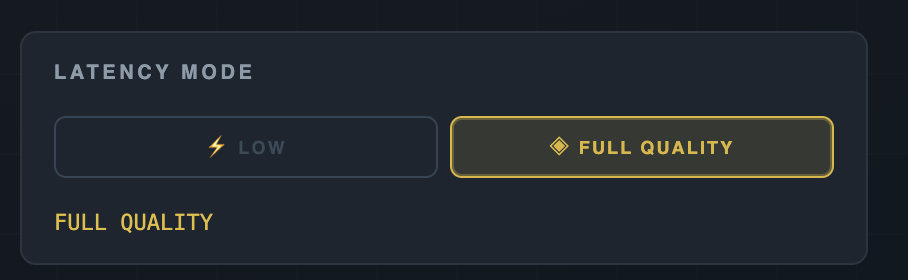
- Low Latency Mode — for tracking and other latency-sensitive applications. Introduces minimal latency, and bypasses the subwoofer channel.
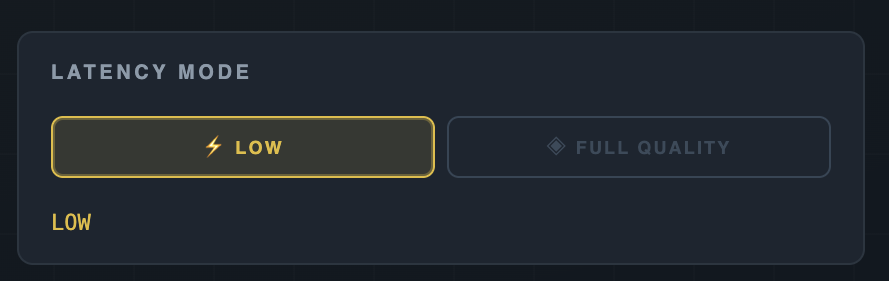
Always keep every speaker in a given system on the same latency mode to avoid phase anomalies between units.
When you switch modes you will see the following on screen, it will take the speaker a couple seconds to switch between latency modes. 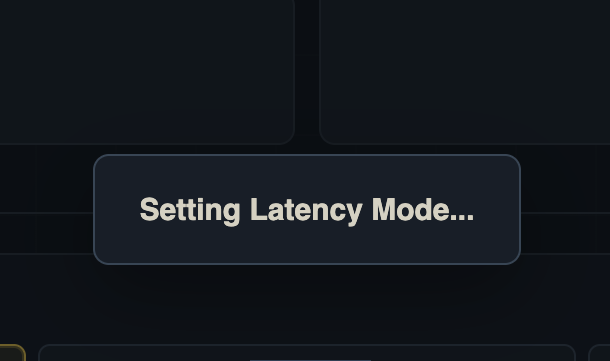
Input Selection
Labeled "Input Source" on screen. A dropdown menu selects the active input: Analog In, AES Channel 1, AES Channel 2, or Dante. A CLIP indicator next to the dropdown lights up if the selected input is clipping.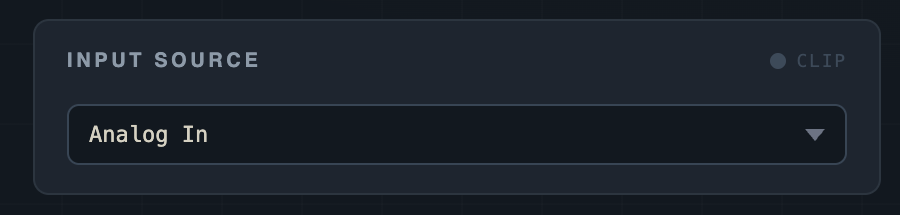
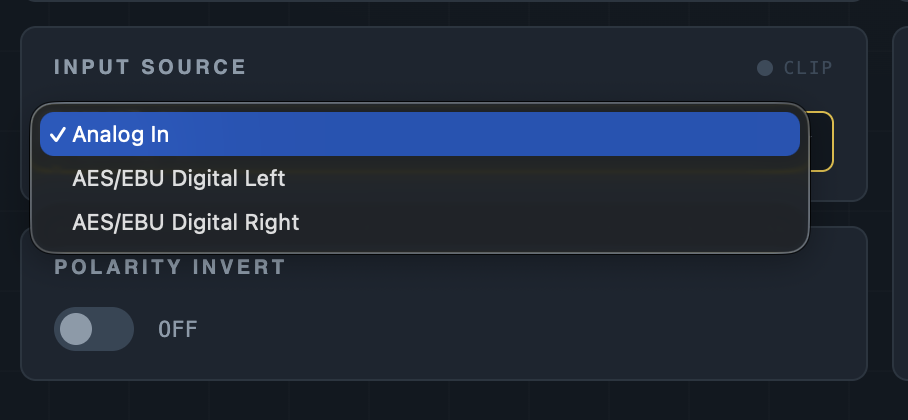
When using AES inputs across a pair, the first Terra you connect to becomes AES Channel 1. Connect the AES output (thru) on that first Terra to the AES input on the second Terra, which becomes AES Channel 2. This works because AES carries two channels over a single XLR connection.
Input Sensitivity
A slider ranging from −24 dB to +24 dB, centered on 0.0 dB at the default position, where input sensitivity is 2Vrms to full scale. A Reset button returns the slider to 0.0 dB.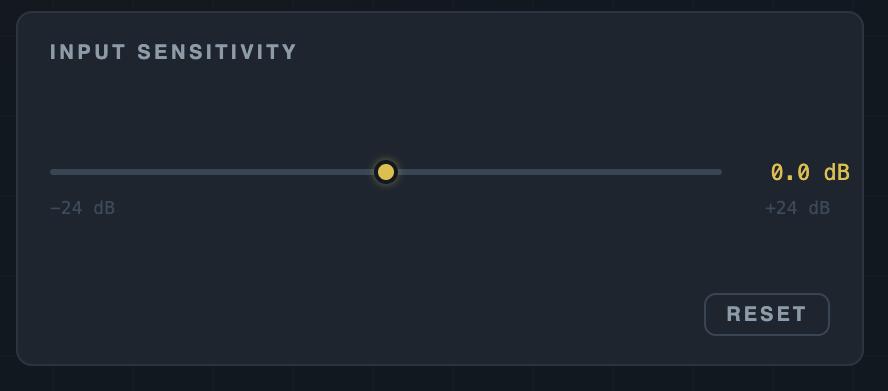 The default (0.0 dB) matches a standard professional line-level source at 2Vrms to full scale. You'd move off the default mainly to match a source that doesn't follow that standard, for example a consumer-level device or a mixer or interface with an unusually hot or quiet output, so the signal reaching the speaker's input stage is neither clipping early nor arriving too low for the DSP's full resolution.
Input sensitivity is not intended to function as a gain control to make your speakers louder. It's an alignment control for matching your source's output level, not a way to add output beyond what your source and the signal chain actually provide. Raising it beyond what your source requires increases the risk of clipping and driver damage rather than increasing usable headroom.
Polarity Invert
On Terra and Terra + Gravity, polarity invert is global, it affects the entire system. On Selene and Selene + Poseidon, each channel has its own independent polarity invert.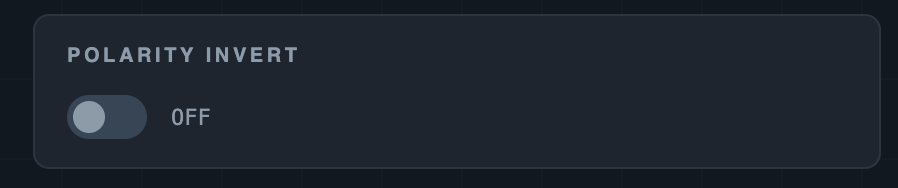
Pictured here (Terra Polarity Invert Control) 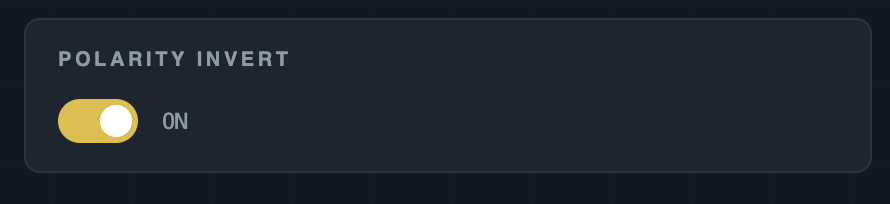
Pictured here (Terra Polarity Invert Control) 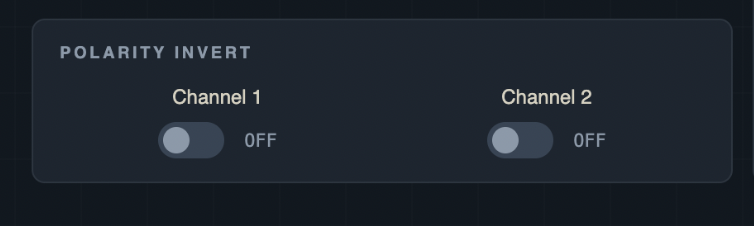
Pictured here (EXCore Polarity Invert Controls)
Use this to correct an absolute polarity mismatch introduced upstream, for example a source device, console, or cable that reverses positive and negative signal polarity relative to the rest of your system. A mismatch like this doesn't always announce itself clearly; it can show up as a thinner, less defined low end or a less stable stereo image, especially in the Terra + Gravity crossover region where the sub and mains need to sum correctly. If flipping polarity noticeably improves bass weight or imaging, that's a sign something upstream was wired or configured out of phase. On Selene and Selene + Poseidon, independent per-channel invert is there for the same reason at the channel level, useful if a console or snake has one channel wired out of polarity relative to the other.
Boundary Control
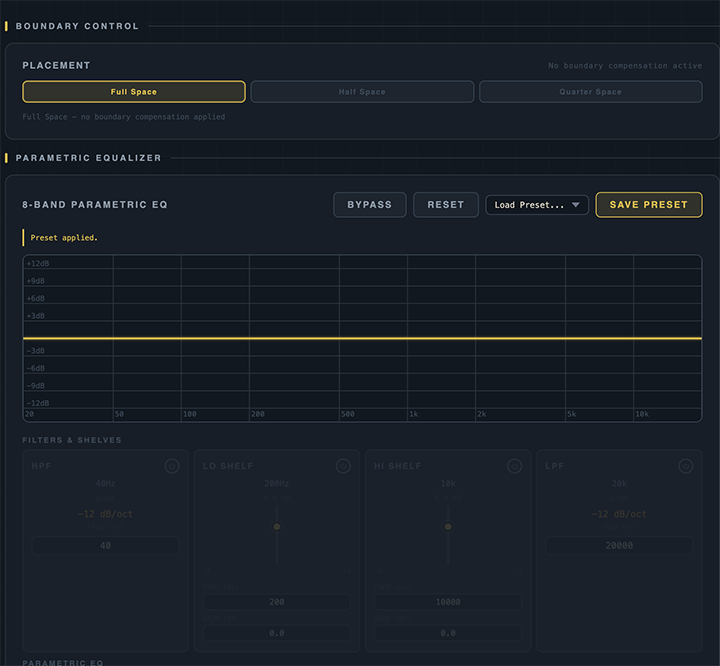
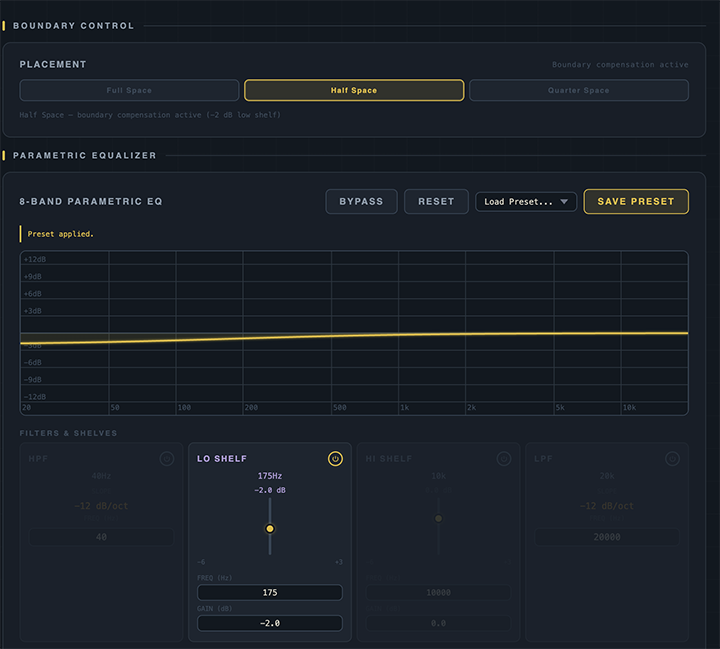
Every Ex Machina loudspeaker is factory-calibrated for optimal performance in full-space setups, away from side and rear walls. Placing a speaker near a boundary like a wall or corner causes that surface to reinforce low frequencies, the closer and more numerous the nearby boundaries, the more bass builds up beyond what the speaker was calibrated for. Boundary Control is the on-screen "Placement" setting that compensates for this in the DSP, rather than leaving you to fight it manually with the parametric EQ:
- Full Space — default, for placement away from walls. Displays "no boundary compensation applied."
- Half Space — compensates for placement close to a single rear wall, typical of a speaker mounted on or near a wall behind it.
- Quarter Space — compensates for placement close to both a rear wall and a side wall, typical of a corner placement or a tight alcove.
NOTE: If you intend to make additional EQ settings, in addition to your boundary settings, you will want to set your boundary control setting before adjusting additional EQ settings.
Parametric Equalizer
Houston includes a parametric EQ to correct for room and placement issues that boundary control alone can't address.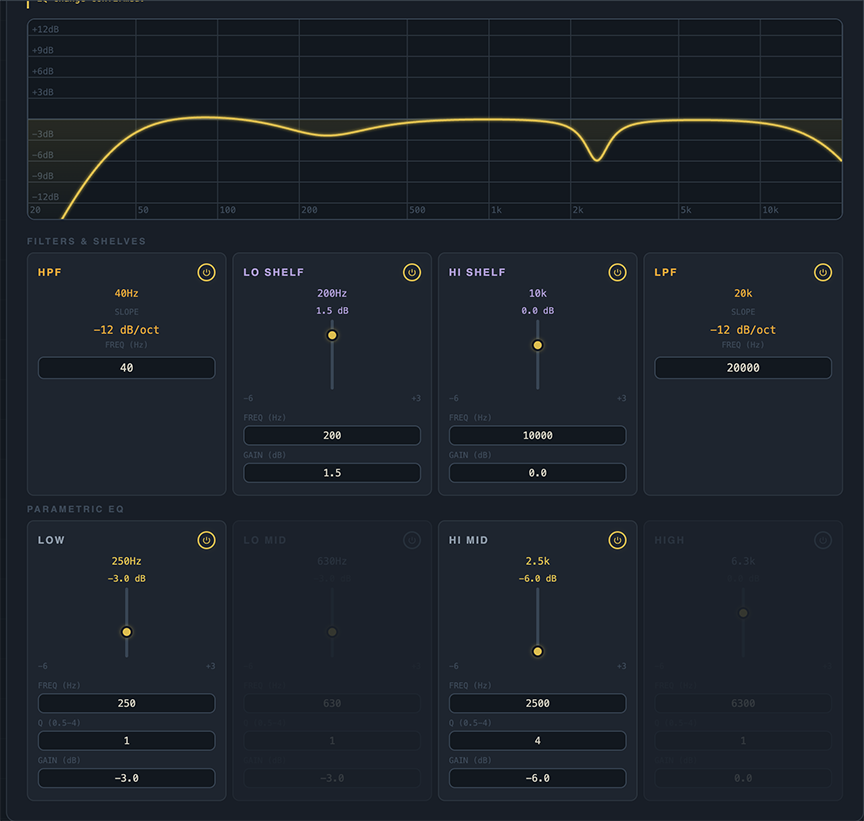
The 8 bands are: High-Pass Filter, Low-Pass Filter, High Shelf, Low Shelf, and four fully parametric Bell bands.
The four Bell bands are intentionally limited in range: Q is adjustable from 0.5 to 4 (4 being the tightest, narrowest bandwidth available), and gain is limited to +3dB of boost or −6dB of cut. If you need a correction tighter than Q 4, or more boost or cut than these limits allow, that's a sign of an underlying room or placement problem that no amount of EQ will actually fix, and pushing past these limits risks damaging your speakers rather than solving the issue.
For EXCore you will see two EQ sections for each channel with their own controls. 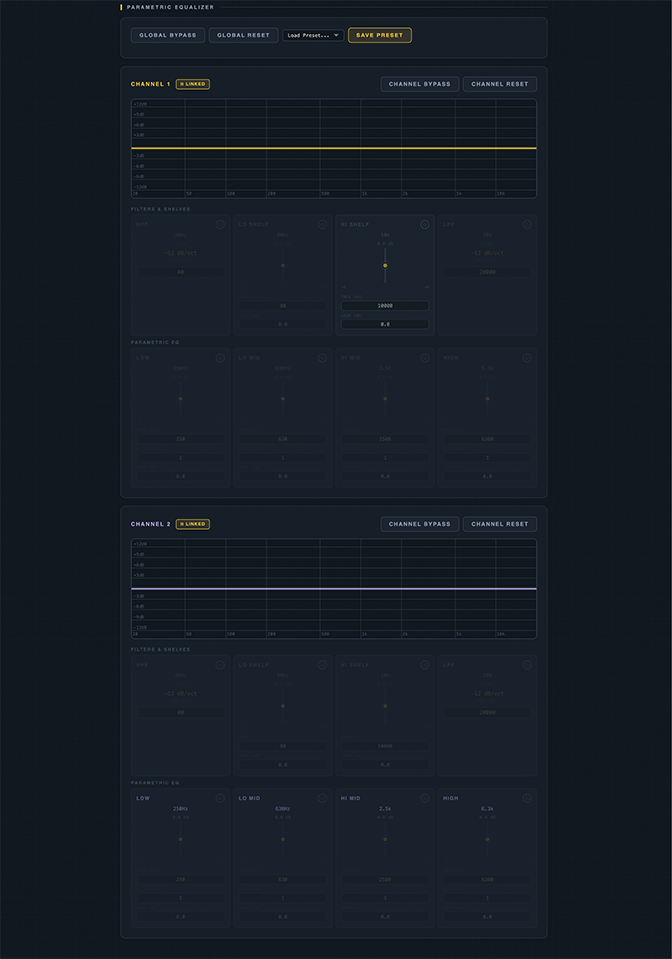
Bypass, Reset, Load Preset, Save Preset
- Bypass — temporarily disables the parametric EQ without clearing your settings.
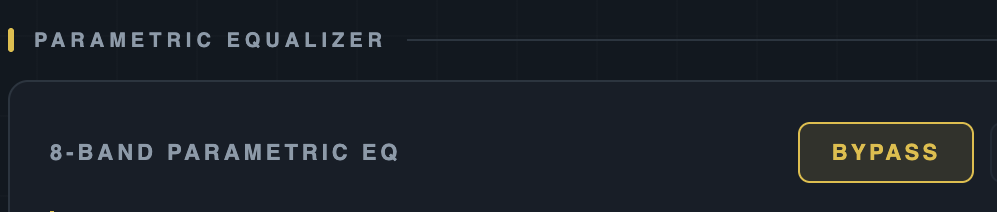
- Reset — clears all EQ bands back to flat.

- Load Preset — recalls a previously saved configuration.
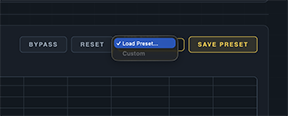
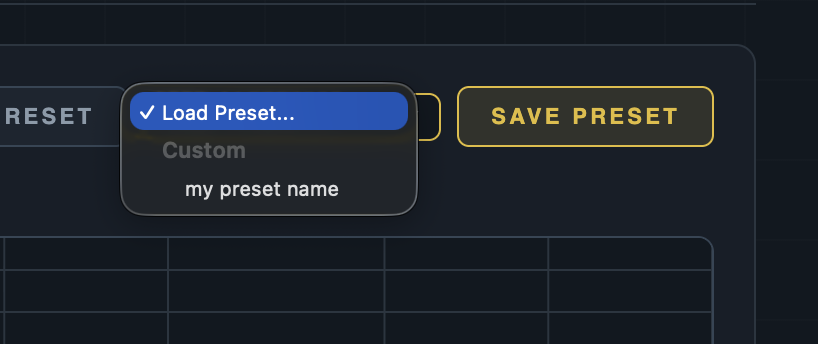
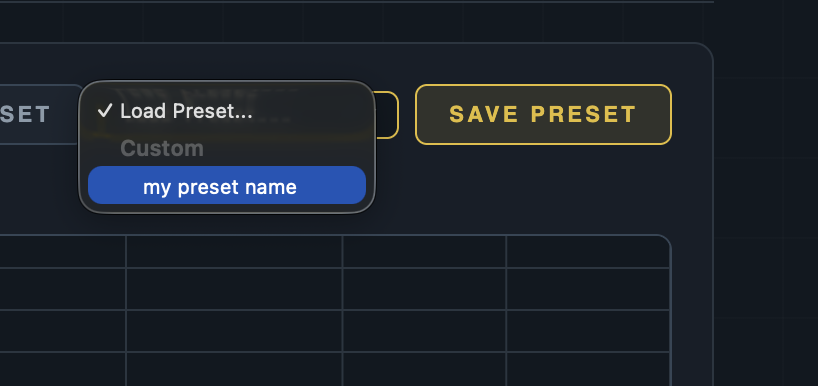
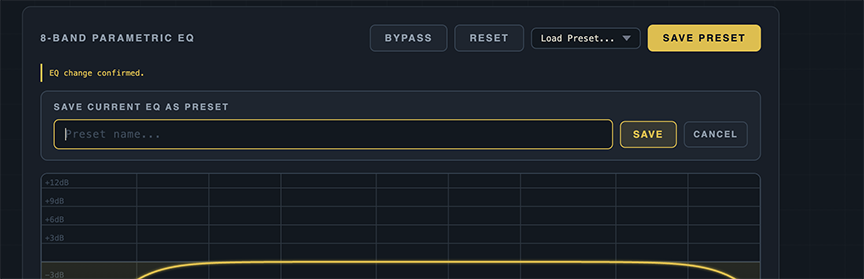
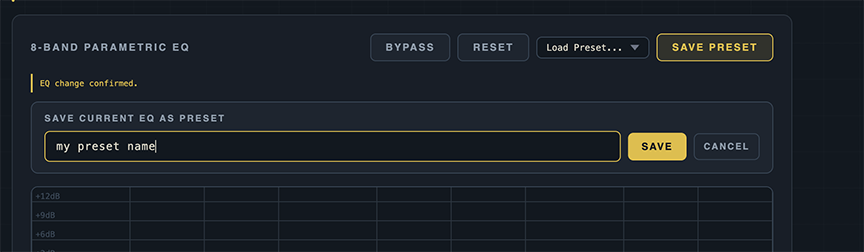
- Save Preset — saves all of Houston's current settings, not just the EQ, as a single recallable preset.
For EXCore, the EQ section adds a link feature as well as Global Bypass and Global Reset functions.
In addition to per channel bypass and channel reset.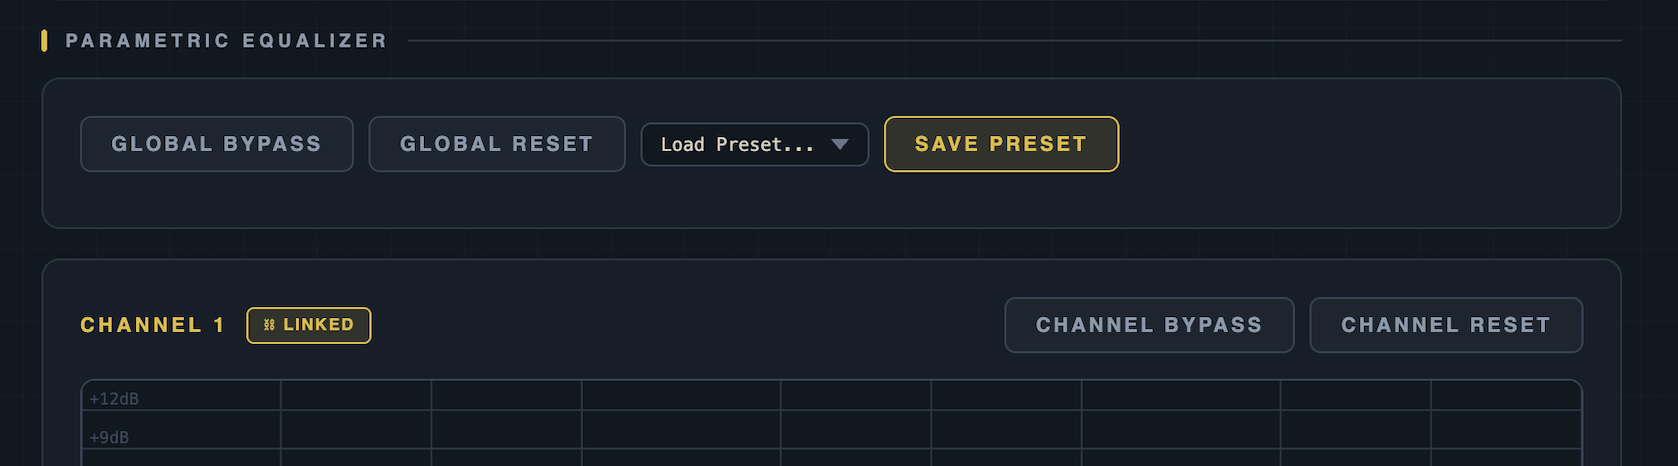
EQ Bands
When running Selene or Selene + Poseidon, you'll see two complete sets of EQ bands, one for Channel 1 and one for Channel 2.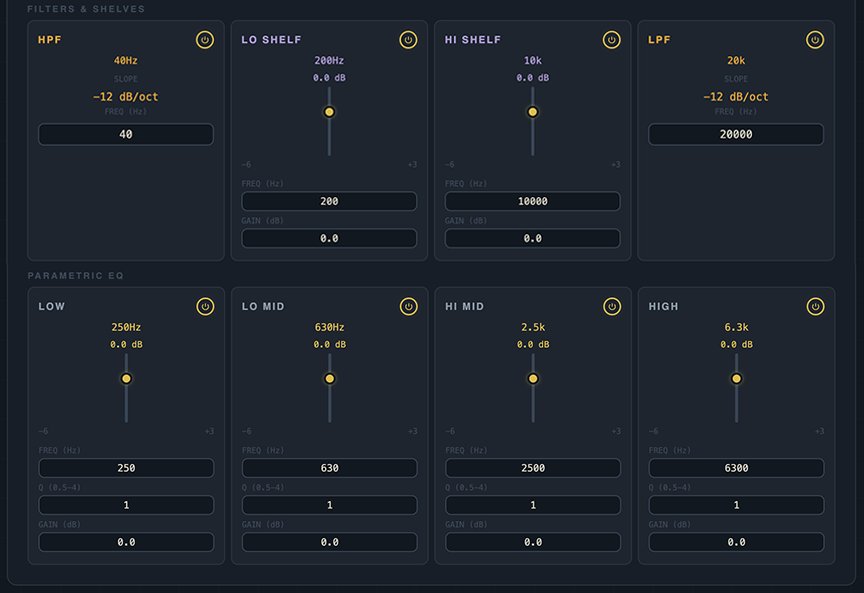
| Band | Type | Frequency Range | Default | Gain Range | Q Range |
|---|---|---|---|---|---|
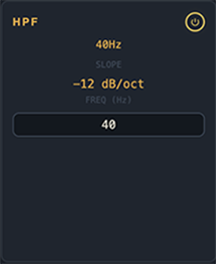
| HPF | HPF, 2nd order, −12dB/oct | 20Hz – 200Hz | 40Hz | — | — |
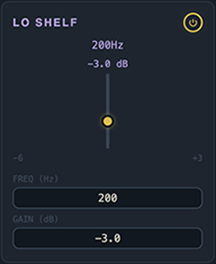
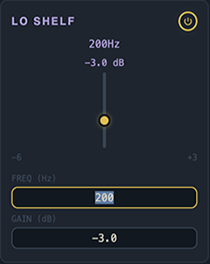
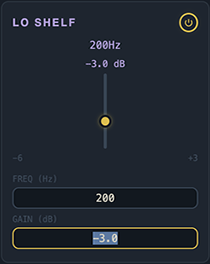
| LOW SHELF | Low Shelf | 20Hz – 500Hz | 80Hz | +6dB / −6dB | — |
| LOW | Peak EQ | 20Hz – 500Hz | 250Hz | +3dB / −6dB | 0.5 – 4 |
| LO MID | Peak EQ | 100Hz – 2000Hz | 630Hz | +3dB / −6dB | 0.5 – 4 |
| HI MID | Peak EQ | 500Hz – 8000Hz | 2500Hz | +3dB / −6dB | 0.5 – 4 |
| HIGH | Peak EQ | 2000Hz – 20000Hz | 6300Hz | +3dB / −6dB | 0.5 – 4 |
| HI SHELF | High Shelf | 1000Hz – 20000Hz | 10000Hz | +6dB / −6dB | — |
| LPF | LPF, 2nd order, −12dB/oct | 2000Hz – 20000Hz | 20000Hz | — | — |
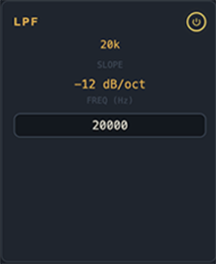
To activate any of the EQ bands, click the little circular power icon in the upper right hand corner of the EQ band window.
Each of the bands, LO and HI SHELF, LOW, LO MID, HI MID and HIGH all have gain sliders and all of the bands have input windows where you can type the desired values.
You can also click on the setting and drag your mouse up or down to change the value.
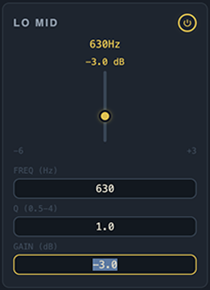
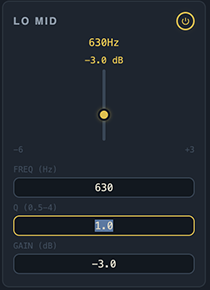
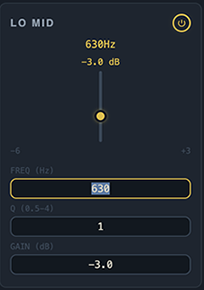
Houston also gives you some additional controls over your Gravity subwoofers. To access these controls, click on the drop down at the top, that will say Terra or Selene (depending on your speaker system) 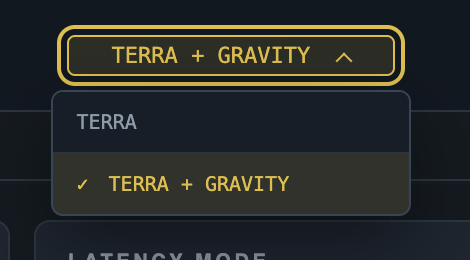
In Terra+Gravity Mode the following additional controls appear: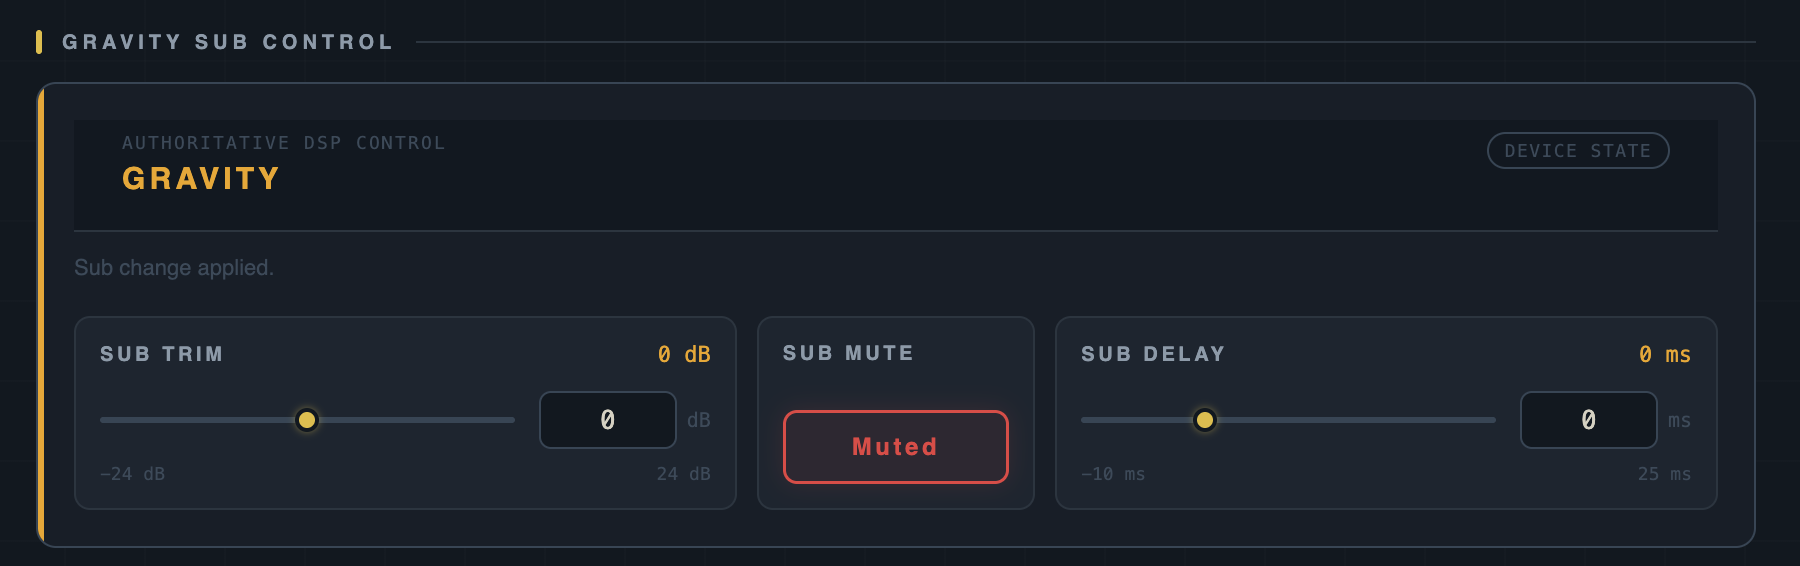
- Sub Trim — standard channel controls for the Gravity subwoofer pair.
- Sub Mute — mutes the individual subwoofer channel
- Sub Delay — Range is -10ms to 25ms, for maintaining subwoofer time alignment when you can't keep Gravity as close to Terra as recommended. You can use the reference below to calculate your sub delay values.
NOTE: To avoid confusion about setting Sub Delay, you will want to use negative Sub Delay values if your Gravity subwoofer is physically behind the Terra speaker it's connected to, you will want to use positive Sub Delay values if your Gravity Subwoofer is physically in front of the Terra speaker it's connected to.
For reference, converting Sub Delay's millisecond range to physical distance (speed of sound ≈ 1,130 ft/s / 344 m/s, roughly 13.5 inches (34.4cm) per millisecond at normal room temperature):
| Sub Delay | Distance (Imperial) | Distance (Metric) |
|---|---|---|
| 5ms | ≈ 5.6 ft (68") | ≈ 1.72 m (172cm) |
| 10ms | ≈ 11.3 ft (135") | ≈ 3.44 m (344cm) |
| 15ms | ≈ 16.9 ft (203") | ≈ 5.17 m (517cm) |
| 20ms | ≈ 22.5 ft (270") | ≈ 6.89 m (689cm) |
| 25ms (max) | ≈ 28.1 ft (338") | ≈ 8.61 m (861cm) |
This is a standard acoustic calculation (speed of sound at room temperature), not a product-specific spec, included for reference.
LFE Controls appear independently from the main subwoofer controls above, with their own volume, mute, and solo. No LFE input control appears when running Selene + Poseidon, since EXCore has no discrete LFE input.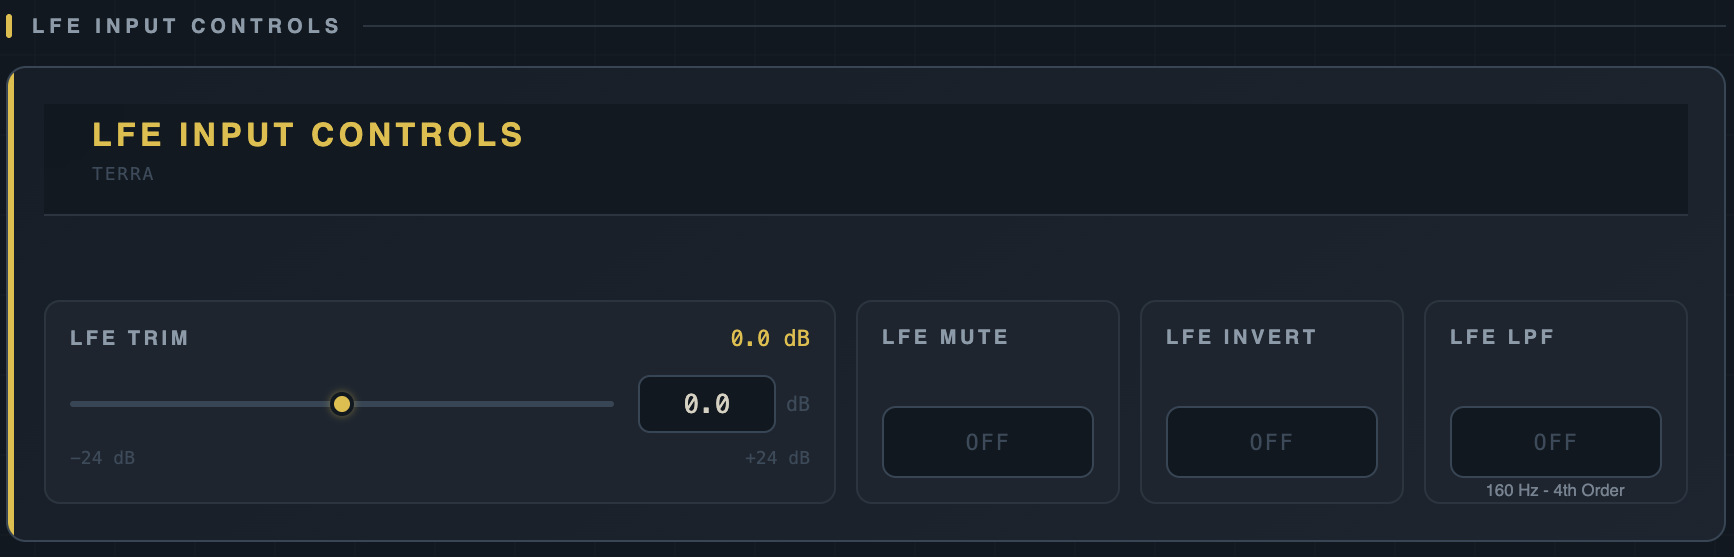
The LFE input controls will not affect any program material playing through your Gravity subwoofer if nothing is connected to the discrete LFE Input on the rear panel of your Terra speaker.
LFE TRIM — range is -24dB to +24dB
LFE MUTE — mutes only the LFE channel
LFE INVERT — inverts the phase for the LFE channel
LFE LPF — engages a 4th order crossover to the LFE channel at 160Hz
If you are already handling bass management upstream of the LFE input, you do not need to use the LFE LPF.
Configure WiFi
Click the Configure WiFi button in the upper right of the Houston screen to access network settings.
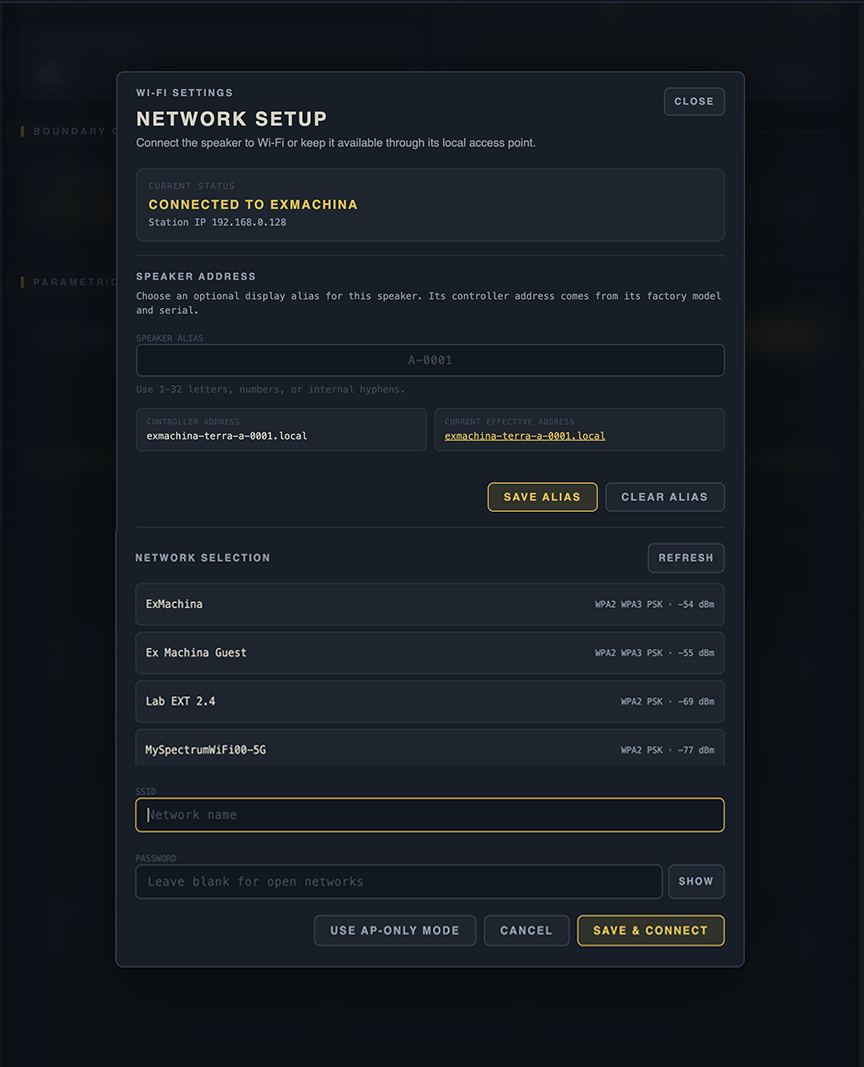
- This will display a pop up window which will allow you to see and configure WiFi information.
- The different sections are as follows:
- Current Status: Shows what WiFi network your speaker or EXCore is connected to and the IP address that was assigned to it.
- Speaker Address: Allows you to rename the speaker address for easier unit identification.
- Network Selection: Allows you to select an alternative WiFi network to the one you configured when you first setup the speaker or EXCore.
- SSID & Password: If you know the WiFi network name you want to connect you, you can enter it here, with the WiFi password.
- AP-Only Mode: This button will allow you to use the speaker and configure settings without needing to connect to your WiFi network.
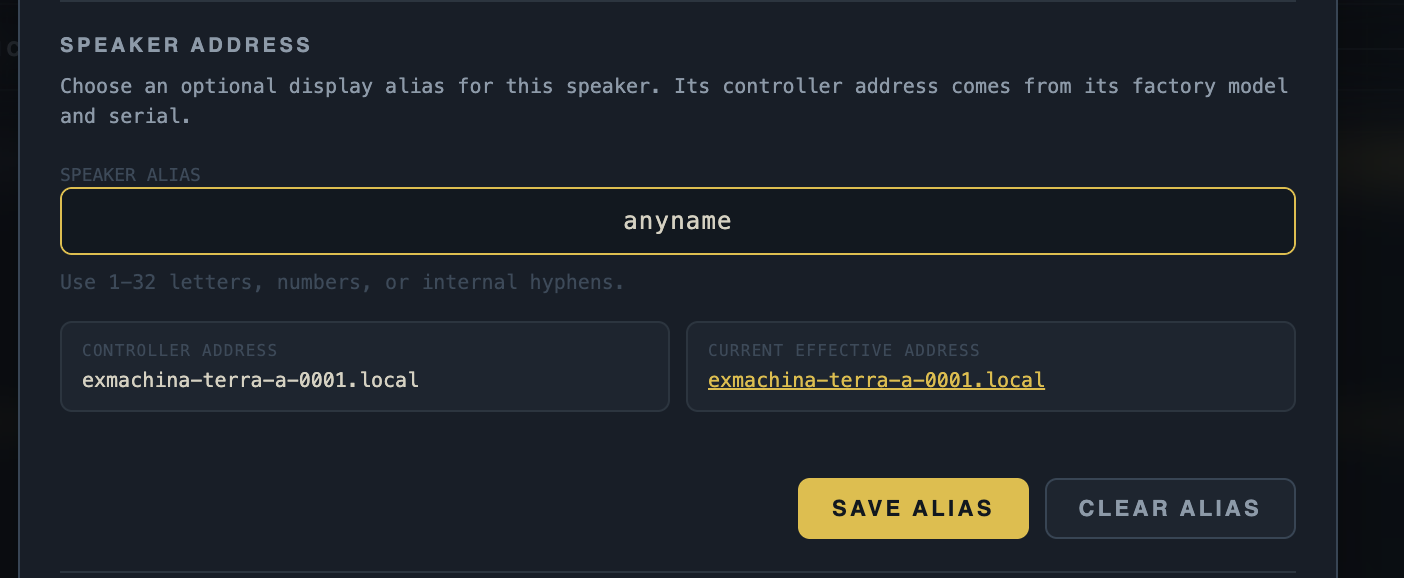
Speaker Address:
It will allow you to set an alias for the speaker, so instead of the WiFi address being exmachina-terra-a-nnnn.local or exmachina-core-a-m-nnnn.local you can change the name to exmachina-terra-left.local and exmachina-terra-right.local for example or anything you want that makes it easier to identify each unit.
Enter the name you want your speaker or EXCore to be and then click Save Alias.
If you want to reset the name to the factory default name you can do so by clicking Clear Alias.
If you know the name of the WiFi network you want to connect to you can enter it in the SSID field.
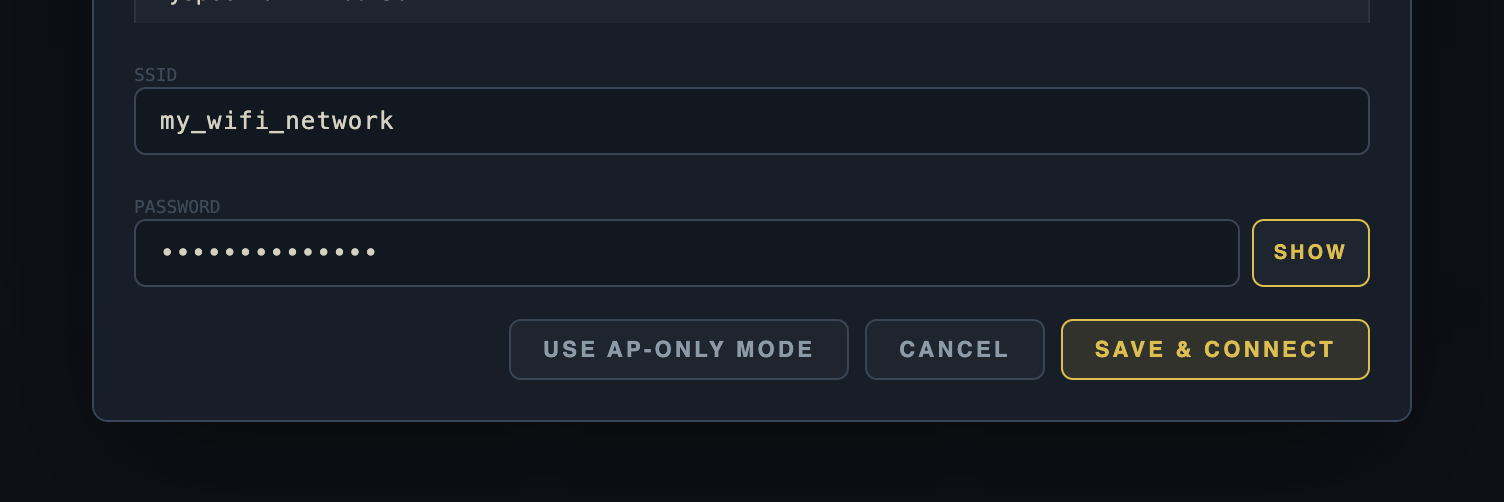
You can click the Show button to reveal the password and click the Hide button to conceal the password.
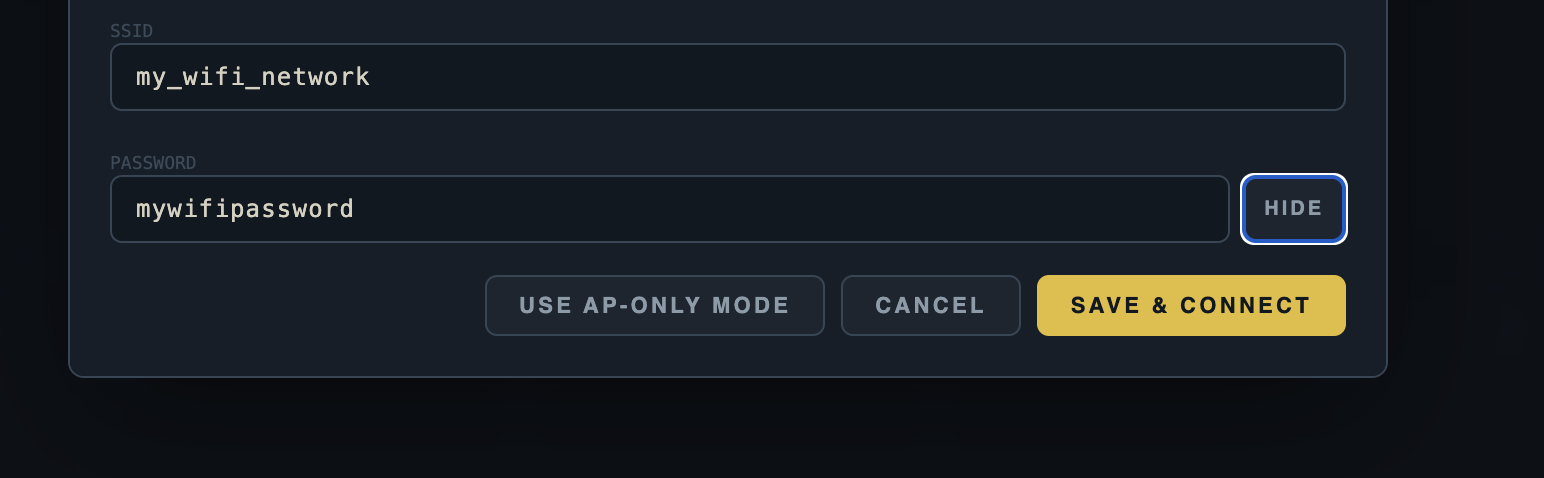
Click Save & Connect and the speaker or EXCore will connect to the newly specified WiFi network.
Use AP-Only Mode: While we encourage all users to connect the speakers and EXCore units to a local WiFi network, we understand that this may not always be possible, either because the network is not reachable, WiFi signal is weak or because the user does not want to connect to a local WiFi network. You can enter the setup mode as you would to connect your speaker to the local WiFi and click "Use AP Mode" or if the speaker or EXCore is already connected and you want to disconnect from the local WiFi you will want to click the Use AP-Only Mode button here. This will allow you to continue to use the Houston software. You will still need to connect a computer to the speaker or EXCore's WiFi network to access the Houston software.
Note: You will only be able to connect and configure or toggle controls on one speaker at a time in AP mode.
Additionally, you will not be able to update software, firmware on your speaker in AP-Only Mode and in the situation of a support request, you will be asked to submit speaker or EXCore logs, which will require WiFi access.
System Information
The Houston software also contains important information about your speaker or your EXCore unit. That can help you keep your speakers current with any software, firmware, DSP calibration version, see your serial number(s) at a glance and share logs.
Click the Ex Machina logo in the upper left corner of the Houston configuration screen to open the system information window and view this information. We'll run through what each of these sections are for.
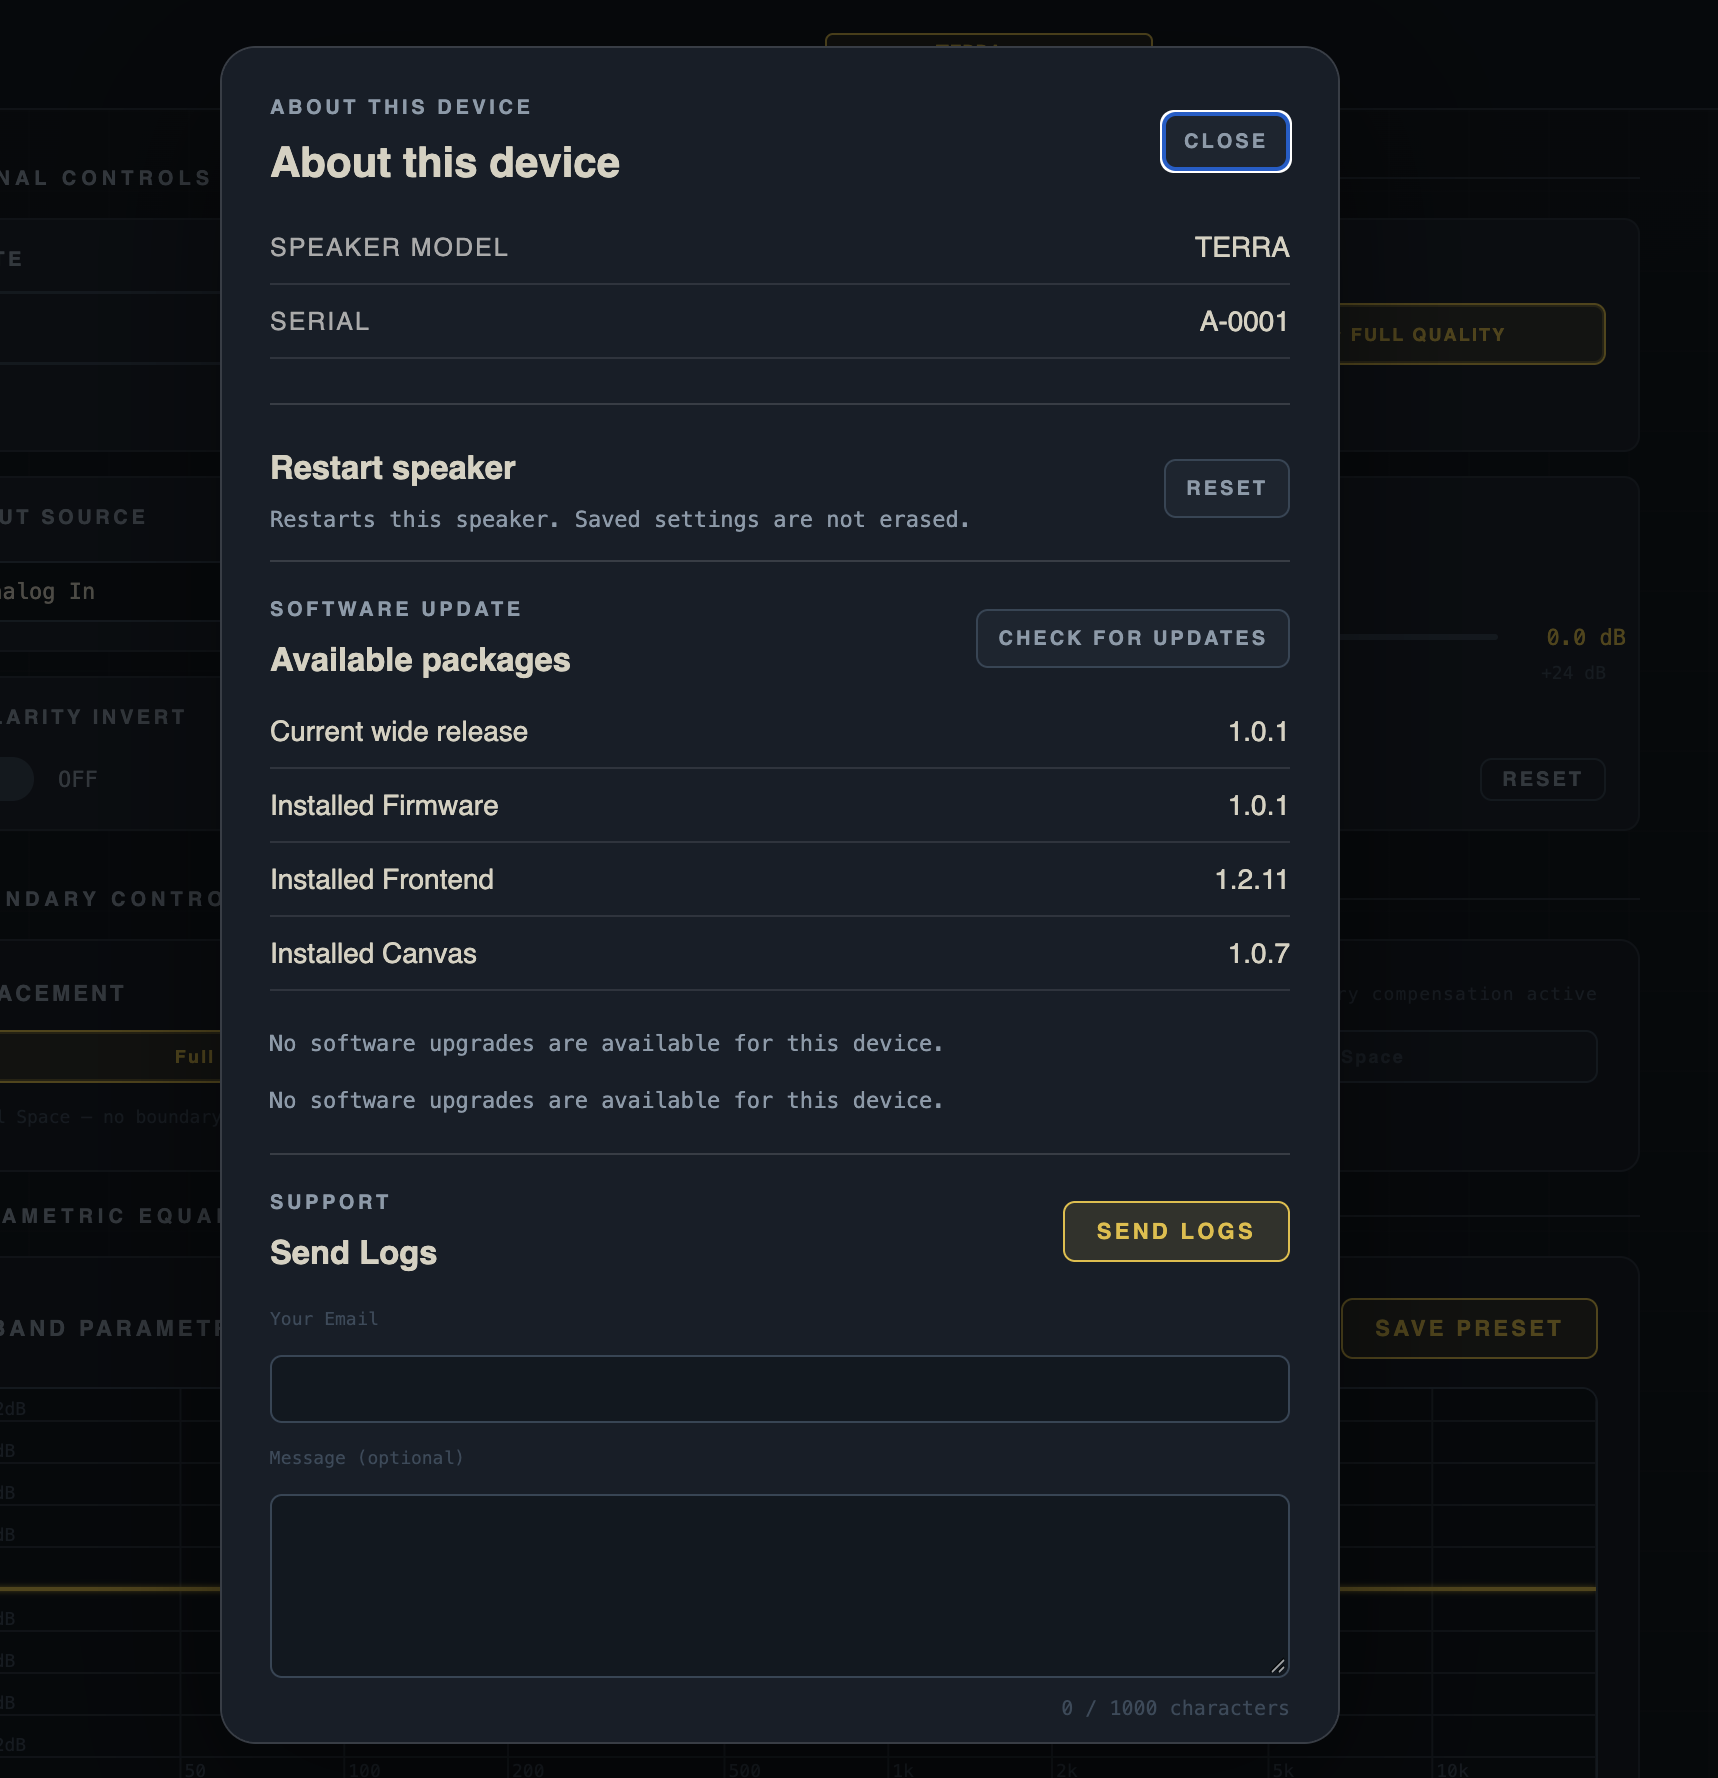
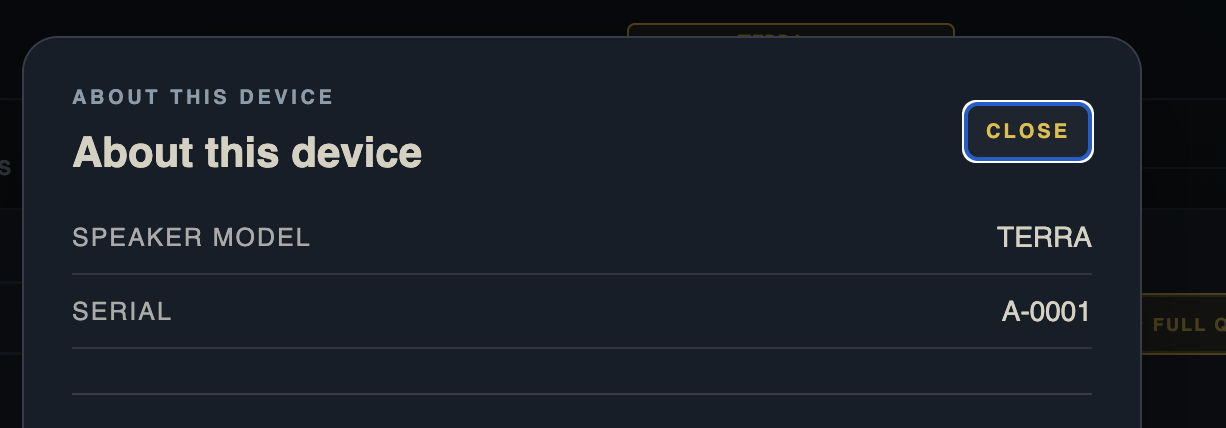
About This Device : Displays all of the serial numbers connected to this device.
Restart Speaker:
Software Update: Displays the current versions of all software and firmware loaded on your speaker or EXCore
Support: Allows you to send the log file for your Terra or EXCore unit to the support team.
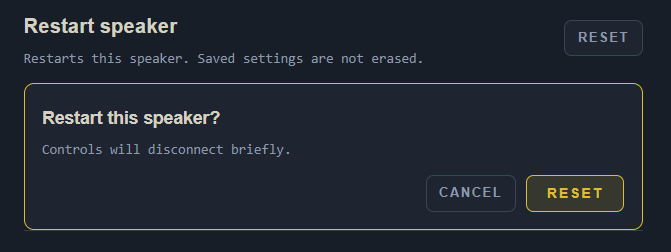
Restart Speaker: If the Terra or EXCore is unresponsive or in an unrecoverable state, clicking Reset will force the system software to restart.

When you click on the Reset speaker button you will be prompted to confirm that you want to reset, press the reset button in this prompt or cancel if you don't want to restart the speaker.
Once you've clicked the reset button, the software will go into a restart cycle and you will see the following page.
You will see the status as the software is reinitializing. This will take around 60 seconds, after which time the main configuration page will reload. 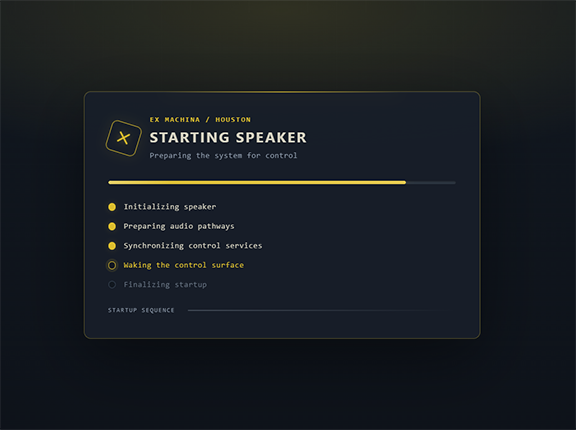
Software Update:
The software update section of this screen shows the current versions of Firmware, DSP calibration and Houston software version that's currently installed.
Current wide release is the main deployment package installed in your speaker.
Installed Firmware - Is the current version of firmware that has been installed.
Installed Frontend - Is the current version of the Houston software that has been installed
Installed Canvas - is the current DSP calibration build we've released and has been installed.
You will want to periodically check for new updates as we are always thinking of new features and making overall improvements to performance and functions.
In most cases you will see a notification on the main configuration screen next to the Configure WiFi button in the upper right corner of the screen, which will alert you that a new update is available. 
When you see this notification, click on the Ex Machina logo in the upper left corner of the configuration screen to bring up the About This Device window.
In the Software Update section you will see the available software update. You may see individual updates to firmware, frontend which is the Houston control software and canvas which is the DSP calibration file. In some cases if it's a large update you will see a package, such as what is shown below.
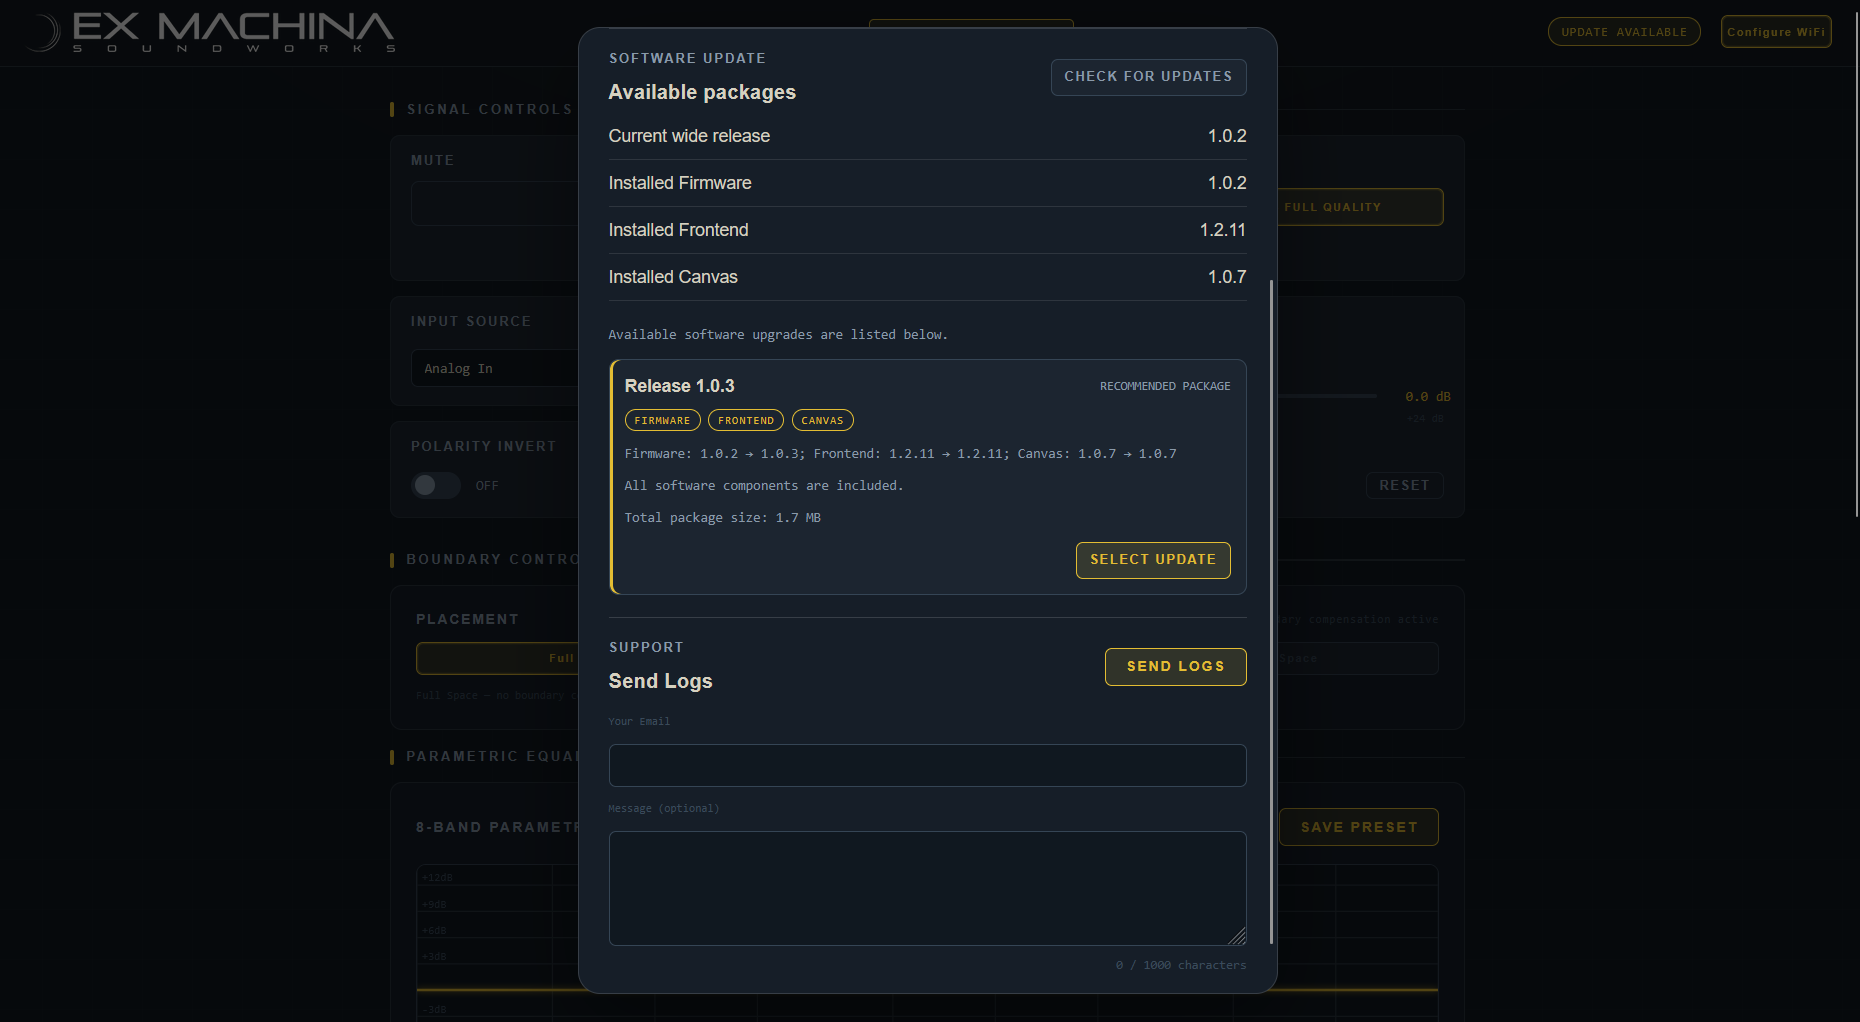
Click the "Select Update" button, to install the software package. Once you click the button you will see the following screen appear. 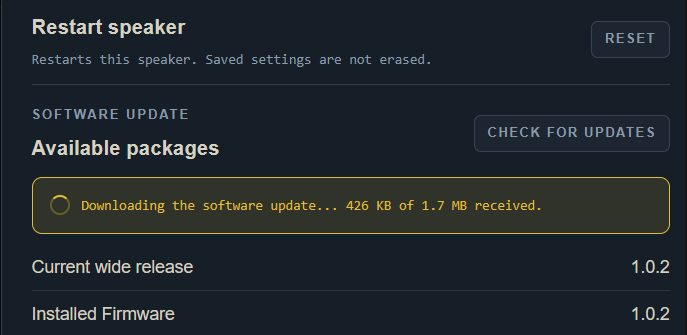
Once the download is complete the following screen will appear. 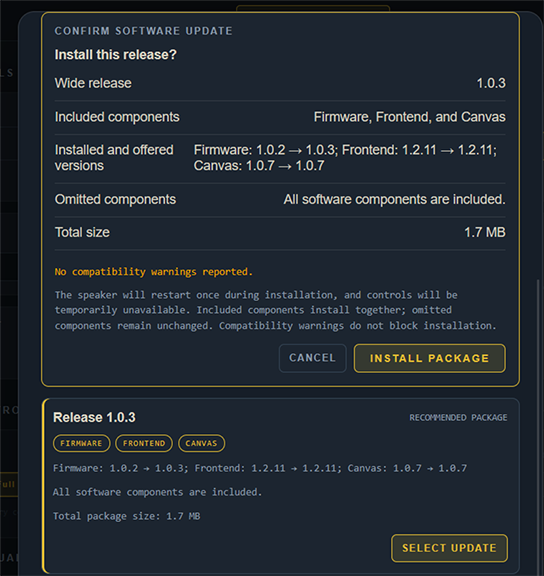
This screen shows release number, the updates included in this package. The installed version on your Terra or EXCore and the version of each that the package is updating you to. If there are omitted components, such as frontend or DSP canvas / calibration files it will be indicated here and the total file size of the update package.
The no compatibility warnings reported: If there happens to be any incompatibility between software revisions, say you missed an update or two and something changed in one of the subsequent updates you missed and the current update is compatibility is conditional on that prior update being installed, you will see an error here, advising you what software update package you need to have installed on your system in order to proceed.
(Internal, how is this handled? How do we handle roll-backs? )
If everything looks good at this point, click "Install Package"
You will see the following dialogue appear on screen, indicating the installation is in progress. 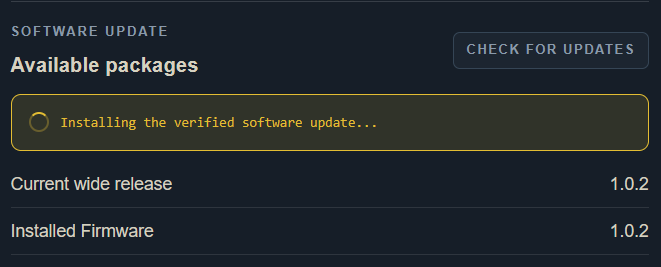
Once the installation is complete your speaker or EXCore will reboot. During the reboot process (60 to 70 seconds)
The Houston software and any controls will be unresponsive, once the reboot is complete (Internal : What happens? How does the user know the reboot cycle is complete?)
If you don't see the "Update Available" notification on the main configuration screen, you can can click the "Check For Updates" button.
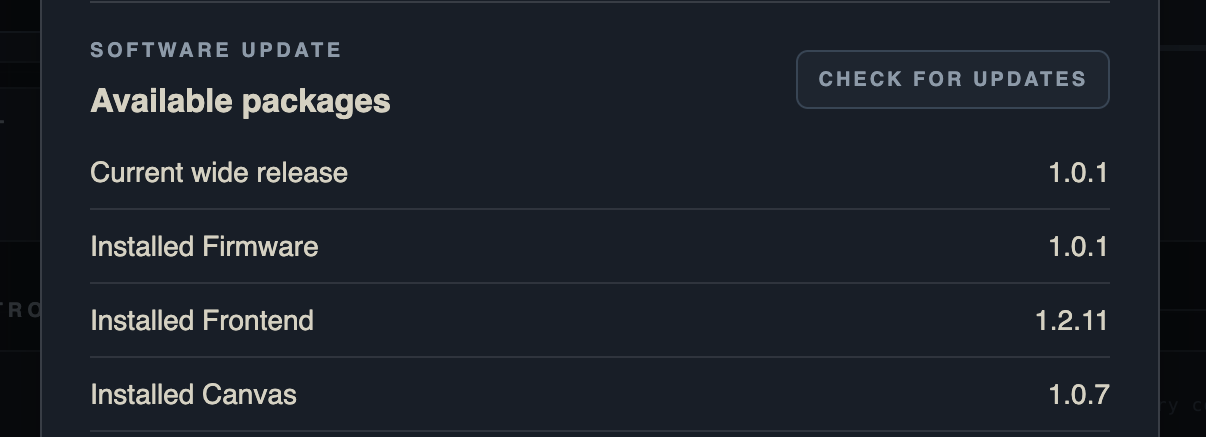
Click on the "CHECK FOR UPDATES" button, to check for available updates from our servers.
When you click on Check for updates, the following status indicator appears.

If there are no updates on the server the following dialog will appear. 
Support:
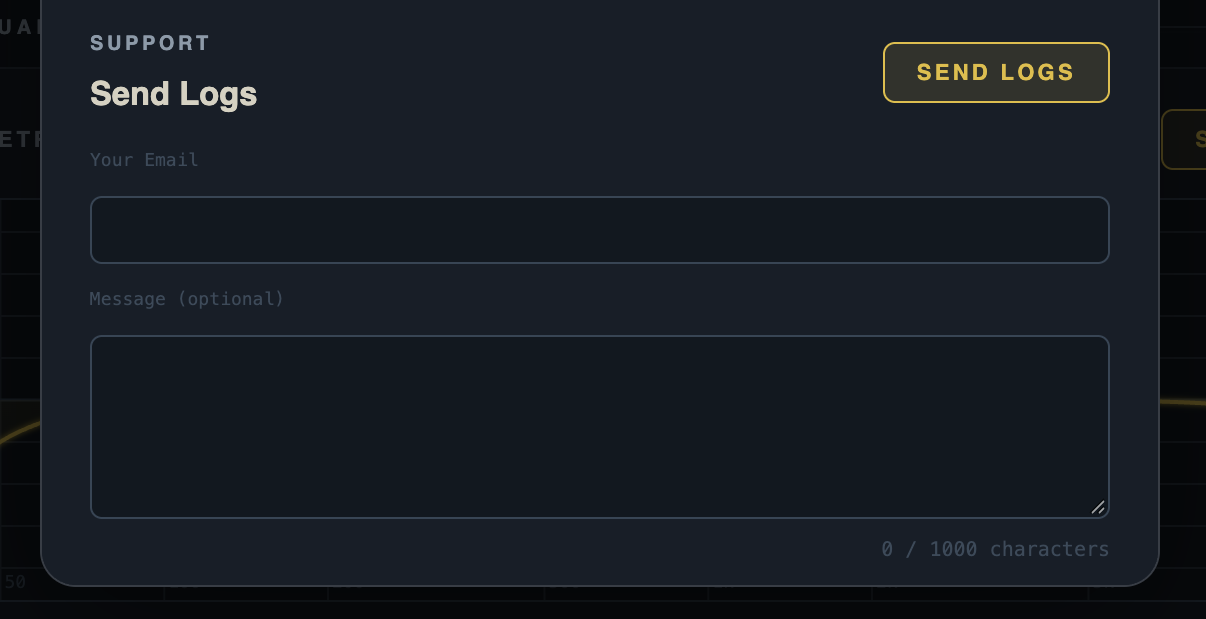
The support / Send Logs section is where you would share your individual speakers log file (or EXCore's log file)
If you are experiencing any issues with your speakers that require contacting our support team, you will be asked to send a log file. You'll want to enter your email address and an optional message. You can also send this ahead of contacting our support team, once you fill out the trouble ticket form over at exmachiansound.com/support/tickets if you've submitted a log file our system will be able to connect them, so the support team has all of the information.
Note: Your Terra or EXCore will need to be connected to a WiFi network in order to send these logs, if you are using the speaker in "AP Only" mode, you will need to go to the "Configure WiFI" section of the Houston software and configure a WiFi connection before you can submit logs to the support team.
To exit this screen click the close button in the upper right corner of the pop up window.
Thank you for taking the time to read this manual, we tried to make all of this as simple as possible to understand and operate. If you have any problems with the Houston software or your speakers, please head over to the Support section and open a ticket and we'll be happy to help you get your issue resolved.
-- The Ex Machina team!
Questions about your system? Visit support or contact your dealer.
Visit Support